How to Free Up Space on Your iPhone Without Deleting Your Important Data
By: Johanna Parker
Posted In: iPhone Tips & Tutorials
It’s crazy to think that we hold almost absolutely every important thing about our lives in the palm of our hand, but that is exactly what our smartphones now do. We have our emails in there, and text messages from friends and family; messages through apps from colleagues and potential business partners; our music libraries, audiobooks, and streaming services; photographs and videos that we have done, and that we have received from others. But that can mean that your iPhone can get really clogged up really quickly, and there’s only so much data that it can hold before it starts flashing up that warning message that you’re running out of storage.
No one likes to see that message – you don’t want to have to pick and choose what to do delete, and it’s not always possible to instantly back all of your data up to the cloud. Even if you could, it’s awesome having all of that at your fingertips just waiting for you to look at it or listen to it. You don’t want to be halfway through telling a story, and then realize that the punchline is no longer on your iPhone! So how can you free up space on your iPhone without deleting your important data?

It sounds impossible, but it is isn’t, and if you follow the simple instructions below, then there is absolutely no need for you to compromise. You should be able to keep the majority of the data that you love, and all it takes is a couple of easy steps. But first, you need to download the program called Safe Eraser on your computer.
|
|


Method 1: Compress iPhone photos to release the storage on your phone
Let's start by compressing your iPhone photos. This method will help you to free up a lot of space on your iPhone, especially if you have store a lot of photos on your iPhone. The best part is you don't have to delete those memorable pictures from your iPhone.
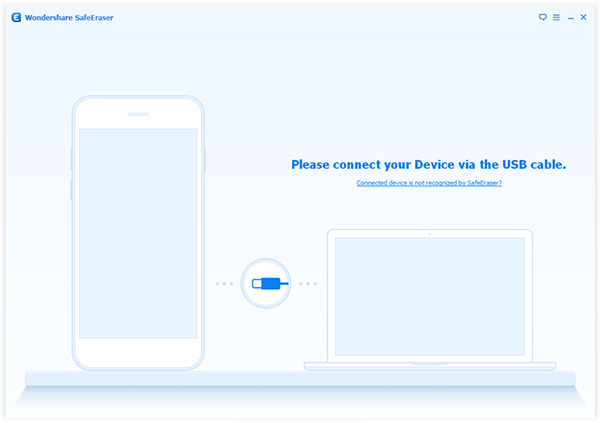
Step 1: Connect your iPhone to your computer
- Connect your iPhone to your computer – and make sure that it is a computer that you trust. Never allow access to your iPhone from a computer that you don’t trust completely, and one that has all of the relevant software to protect from viruses and malware.
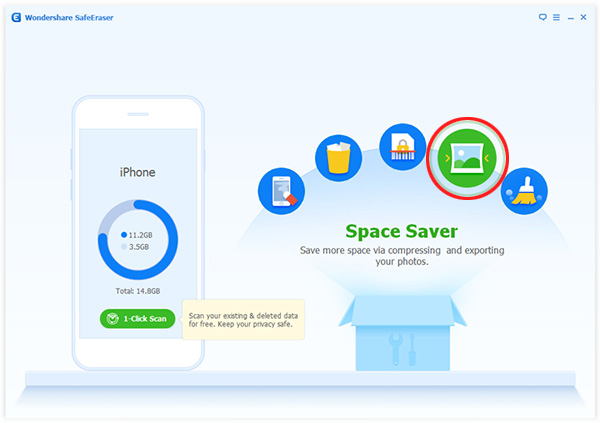
Step 2: Run the program and launch space saver mode
- Now you need to start running the Space Saver mode of the program. If this is the first time that you have run this on your computer, it could take a few minutes to open up. On the Space Saver window, you should see a button that says ‘Space Saver’. That is the one that you should click on.
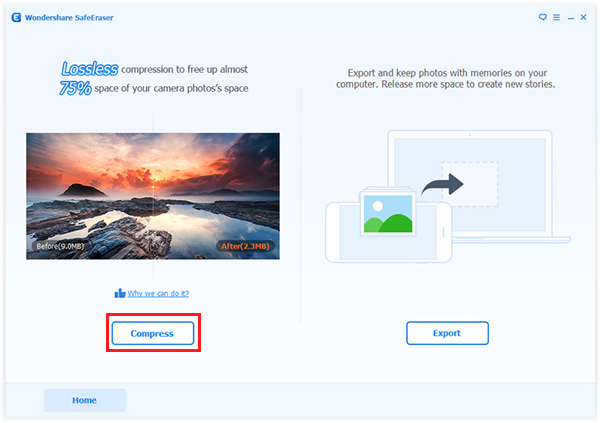
Step 3: Choose the compress option and click ‘Start’ button
-
You will then have two options: Compress or Export. Choose Compress, and the program SafeEraser will look through your iPhone and find all of the images that can be compressed, and then it will show them as a list. Then press ‘Start’. Be patient while the computer and the program works hard on creating a little more space for you on your iPhone. After the program has finished, it’ll tell you just how much space you have saved.
Tip: If you need even more space, you can export the photos to your computer and delete them from your iPhone with the help of this program.
Option 2: Use iOS Optimizer mode to clear junk files from your iPhone
You can optimize your iPhone, and free up even more space on your iPhone by using the iOS Optimizer mode of the program that clears junk, temp, log, or cached files stored on your iPhone.
Step 1: Plug your iPhone to your computer via USB cable
- If you have unplugged your iPhone from the computer, then you will need to plug it back in again, and wait for the computer to recognize it. Be patient, and don’t rush it – sometimes it can take a little longer than usual.
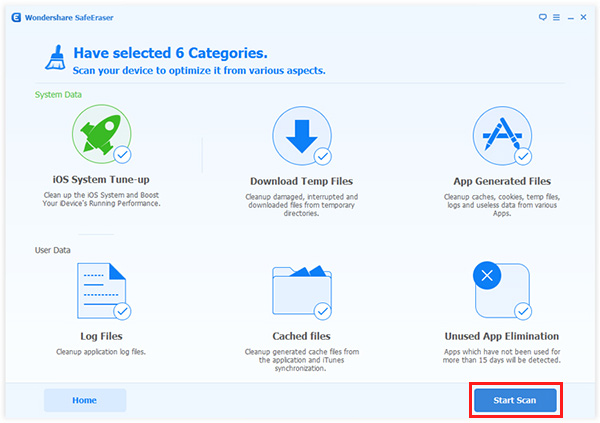
Step 2: Click iOS Optimizer button
- Now it is time to click on the iOS Optimizer button, in order to start the computer program. You will then have a choice of six different categories to choose from: Unused App Elimination, iOS System Tune-up, App Generated Files, Cached Files, Download Temp Files, and Log Files. Any of them are a good way to optimize your iPhone.

Step 3: Click the ‘Start Scan’ button
- The next thing to do is to click on the ‘Start Scan’ button. This will make the SafeEraser program start to search through your iPhone for the files that match the category that you selected to optimize. Depending on how much data you already have stored on your files, this could take a long time – perhaps even several minutes.
Step 4: Select the files you want to optimize and click ‘Clean Up’ button
- When the scan has been completed, the computer program will list all of the different areas that your iPhone could be optimized better, and exactly how. Now you can go through the options, and decide which ones you want to choose. When you have decided all you have to do is click on ‘CleanUp’, and the computer program will start to optimize your iPhone in the areas that you chose. You will see a progress bar so you know roughly how long it will take.

When it is finished, your iPhone will completely reboot, and then the computer will tell you how much space you have now saved through the optimization process.