How to Set Up and Use iCloud Drive for Your Windows PC
By: Johanna ParkerPosted In: iOS Tips & Tutorials
Let’s face it, these days technology plays a crucial role in the day to day goings on in our lives, so much so in fact that without it many of us would literally be stuck in limbo, unable to complete even the most seemingly trivial of tasks. Technology has advanced at an extraordinarily fast rate over the last decade or so, with many people putting devices such as the smart phone down to the reason why. Ever since the release of Apple’s groundbreaking iPhone, the way we use our phones and devices and the way we manage our media is constantly evolving and improving. These devices are basically high-powered computers that you can fit in your pocket, and just like all technology, they are constantly being updated and improved. To help users to better manage their important files, media, and other personal details, Apple created the iCloud which revolutionised the way we manage our documents. With the release of Apple’s latest iOS 8 upgrade Apple have also release their latest iCloud drive, which we’ll be looking at here. In this article we’ll be looking at what the iCloud drive is and why it’s so beneficial, as well as providing step by step instructions on how to set it up on Windows, as well as iPads and iPhones too.
So, what exactly is iCloud drive, and why is it so beneficial?
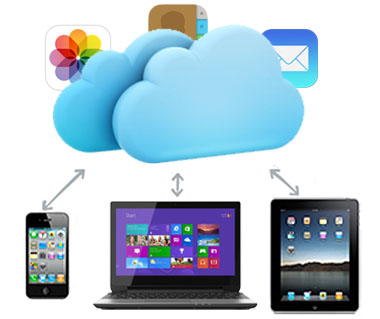
If you’ve ever heard of Dropbox, then the iCloud drive is basically Apple’s version of that, with a few additional features. Since the year 2011, apple have already had their now renowned iCloud system in place, but it is only now that they have released their iCloud drive, allowing users to gain practical access to a number of files and documents across a variety of different platforms using the cloud. It works by syncing and connecting all of a user’s apple gadgets together with one another, helping to ensure that all files are up to date. That means that if you own an iPad, an iPhone, a Mac, or even a Windows PC, then each one can be synced and connected with one another, allowing you to share documents between each one. It also allows users to share locations, documents, photos, calendars, events, and more, with their friends and their family members. A great example of how the iCloud drive works, and why it is so beneficial is as follows. Imagine you begin working on a key document at work on your laptop. On your way home on the train, rather than struggling to get your large computer unpacked and set up, you could simply open up the same document on your iPad, or even iPhone, and edit it as needed. Users are not required to import or copy any files or documents and every single app they sync with the iCloud drive will get its very own folder on the user’s computer. You just basically open up each various app on your chosen device, click on the app, and load the file which is saved within the app, it’s as simple as that.
Setting Up iCloud Drive on a Windows PC
You can easily enable the iCloud Drive on your Windows PC. Doing so will ensure that bookmarks, photos, files, and documents are all automatically updated to all of your other Apple devices. However, before you get started with enabling the iCloud Drive for your Windows, there are a few things you will be required to do.
- If you would like to use mail, calendars, reminders, and contacts, make sure you have installed Microsoft outlook version 2007 or higher.
- If you would indeed like to enable iCloud Drive, make sure you upgrade your account to the iCloud Drive account.
Now that those things are out of the way, here’s all you will need to do to enable iCloud Drive on Windows:
Step 1:
Before doing anything you will need to download iCloud Control Panel for windows which can be downloaded from official Apple website.
Step 2:
Next, users will need to restart their computers.
Step 3:
Next, users must ensure that the iCloud for Windows is open and running. If it doesn’t automatically open, users can click on start, open apps or programs, and click on the iCloud icon.
Step 4:
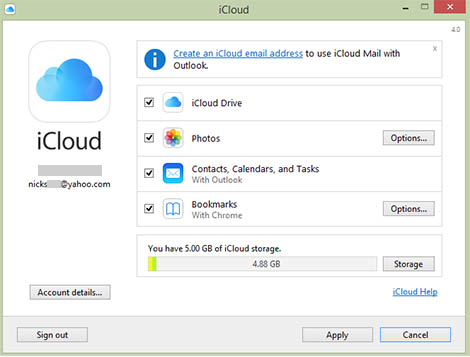
From here users will need to sign into iCloud using their unique apple id and password. They will then select the types of content which they would like to keep up to date throughout their various devices, so photos, mail, bookmarks etc.
Step 5:
Finally, users should click apply, and that’s it, their photos documents, files, and more will now be kept updated and will be accessible via their other devices.
Enabling the iCloud Drive on iPad or iPhone
Enabling and setting up the iCloud drive on iPads and iPhones couldn’t be simpler, once you know how, and for that reason here’s a step by step guide to walk you through the process. When a person upgrades to iOS 8, they will get a prompt asking them whether or not they would like to upgrade to iCloud drive. If users say yes then they don’t really need to do a thing. If they said no however, then they can still enable the iCloud drive by following these easy steps listed below:
Step 1:
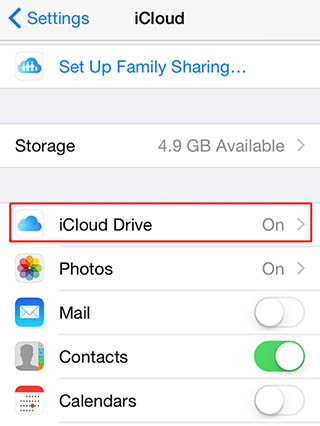
Begin by launching the settings app on your device, running iOS 8 or higher.
Step 2:
Next, tap onto the iCloud icon.
Step 3:
Now tap the iCloud Drive icon and switch ON the iCloud Drive. And that is basically it.
If you have other iOS devices which aren’t actually currently using the iCloud Drive, you will receive a pop up warning and will need to ensure that they are all updated to ensure that they’re all compatible with one another.
iCloud Drive Subscription Plans
The drive itself comes with 5GB of space for no additional cost, but if you feel you will require more, you can choose different subscription plans. Simply tap settings, select iCloud, select storage, select ‘Change storage plan’, choose the different plan that works best for you, click on the BUY icon in the top right hand corner, and finish the purchase by signing in with your iCloud account.