How to Transfer iPhone Videos to PC (Windows XP/Vista/7/8/10)
By: Johanna ParkerPosted In: iPhone Tips & Tutorials
One of the striking features of iPhone is the built-in Camera, which is great for HD video recording. It allows you to shot HD videos anywhere & any time. However, once when you're ready to transfer iPhone videos to your PC, you may find it is not quite as convenient like transferring files from USB storage to PC. This is just because Apple wants to preserve the copyright for the media supplier. But what to do when you do not have enough space for saving videos on your iPhone? Not to worry as in this tutorial we will show you some easiest ways to copy iPhone videos to PC without any trouble.
On a Windows PC the easiest way to import videos from your iPhone is to use Windows Explorer (Windows Vista and Window 7) or Scanner and Camera Wizard (Windows XP). But you can use this method to import videos captured using iPhone's built-in camera. You are not allowed to import videos synced from iTunes. Alternatively, you can also use iPhone management program called iPhone to PC Transfer to export all types of videos/movies from iPhone to a PC without any limitations. Click here to see how it works!
Method 1 (a). If you’re using Windows Vista, Windows 7, Windows 8 or Windows 10:
Note: If you use passcode to secure your phone, you must unlock it before connecting it to your computer unless you will not be able to transfer your iPhone videos to PC when your phone is locked with passcode.
Step 1:
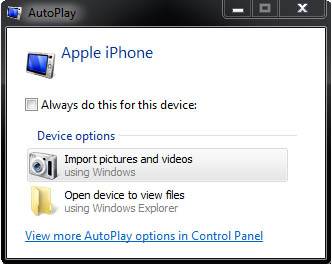
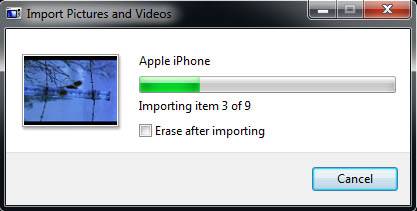
- Plug in your iPhone to computer. When the Auto-Play windows appears, choose “Import Pictures and Videos” option. This option will automatically transfer all the photos and videos on your device back to a folder on your PC. By default, these videos will be transferred to my pictures folder. If the dialogue window does not automatically appear, you may need to enable it by going to control panel.
Additional Steps (only applicable on Windows Vista and Windows 7):
Step 2:
Click on the “Open device to view files” option if you want to manually copy your photos and videos. In the import settings, you can enable the option, "Always erase from device after copying" to delete videos after importing and free up some space on your iPhone.
Step 3:
Input tag names (optional) and click the "Import" button.
Step 4:
Once the import is completed, you will see videos in the My Picture or the folder you’ve selected in the first step.
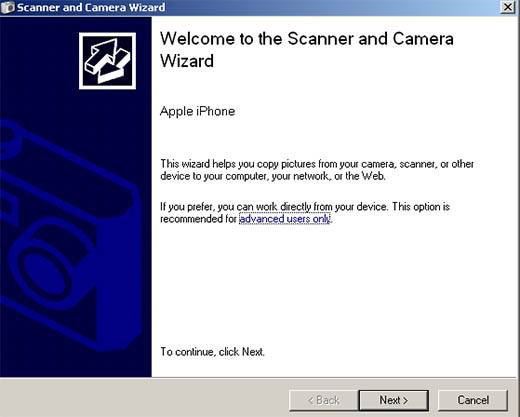
Method 1 (b). If you’re using Windows XP:
If you’re a Windows XP user you can use Windows XP Scanner and Camera Wizard to transfer iPhone to computer. Follow the following steps:
Step 1:
Connect your iPhone to computer. Wait for the Windows XP Scanner and Camera Wizard to be fully open. Click next button.
Step 2:
- Select the videos that you want to copy to your PC. Click Next.
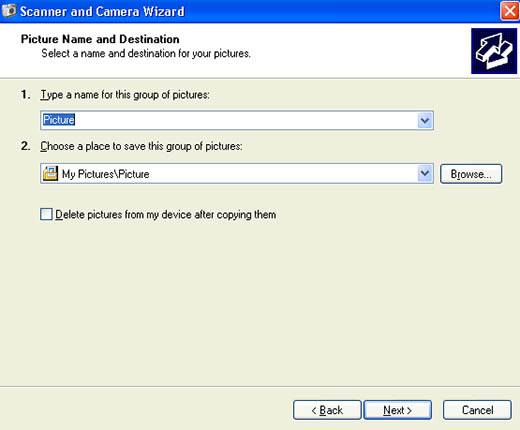
Step 3:
- Use the default folder destination and the tag names, or change these as you want.
Step 4:
- Click the next button and this Wizard will start importing your iPhone images.
Step 5:
- After this step, Wizard will show you imported images, with a link to access these images.
Method 2: Use iPhone to Computer Transfer - iTransfer Tool (Windows XP/7/8/8.1 or 10)
If you want to copy iPhone videos to PC more freely and easily, give a try to iPhone to PC Transfer Tool. Apart from importing videos to PC, this tool can also help you transfer or backup other iPhone content and information such as Music, Video, eBooks, Podcasts, Contact List and SMS from your phone to computer.

Step 1: Install and launch iPhone to Computer Transfer
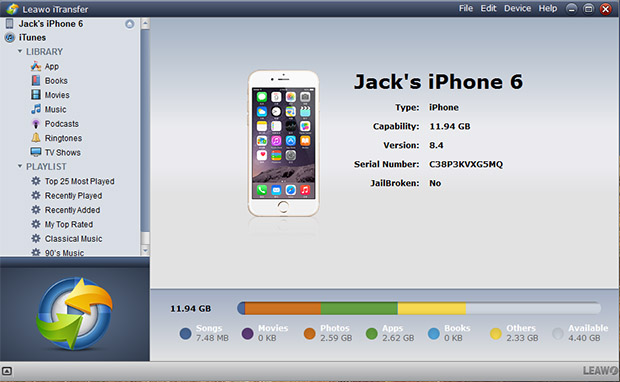
Download and install iTransfer on your Windows PC. Now, launch this program and connect your iPhone to PC. After doing this, all information related to your iPhone such as type, version, capacity and format will be shown on the interface of the program.
Step 2: Import iPhone videos to local
-
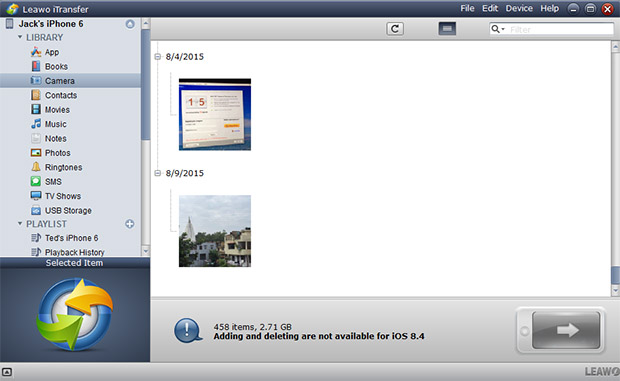
(a). Click on the “Camera” icon in the program library. Now, you will be able to see your iPhone videos and pictures on the main interface of this program as shown in the image below:
-
-
-
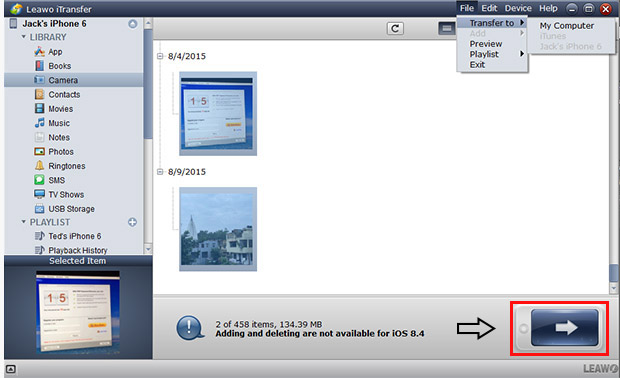
(b). Select the videos that you want to transfer to your local drive by clicking the videos while holding the CTRL key. Now go to the File menu and choose “Transfer to My Computer". Select the destination folder on your PC and click the “Transfer Now” button to start the transfer process. You can also click the button labeled "Transfer", check the "Save to Folder" checkbox, and hit the "Transfer Now" button to export selected videos from your iPhone to your computer.
That’s it! Now, you can see your iPhone videos on your computer with original quality.
Mac OS Version
![]()
Awards & Accreditations