How to use iPhone/iPod Touch as Flash Drive on Mac
By: Johanna Parker
Posted In: iPhone Tutorials & Tips
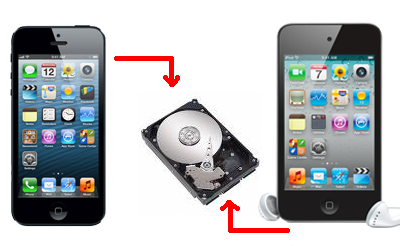
For everyone who uses a computer, there is going to come a time where they need an external hard drive. An external hard drive is a great way to free up some space on your computer or back up the files on your computer. Did you know you can use your iPhone/iPod Touch as an external flash drive? Well, you can! Thanks to a program called iPhone to Mac Transfer, it is easy to use your iPhone as an external hard drive on your Mac computer.
iPhone to Mac Transfer will allow you to open, copy, and save files from your Mac computer to your iPhone. It allows you to access the device from other applications and you can browse through your iPhone from the Finder. This handy program even allows you to mount multiple iPhones at the same time. The best part about this program is that you do not have to jailbreak your iPhone in order to use it. Furthermore, this program also works great with iPods. Which means you can use your iPod Touch as external hard drive on your Mac computer as well.
Now we’re going to show you a step-by-step process to use your iPhone/iPod Touch as an external hard disk on your computer using iPhone to Mac Transfer and a third-party Plug-in OSXFUSE. You can download the iPhone to Mac Transfer Tool from here:

On Mac OS X 10.7 or Above:
Step 1: Install OSXFUSE Program
First of all you need to download program named OSXFUSE and install on your Mac. Click here to download this program absolutely free.
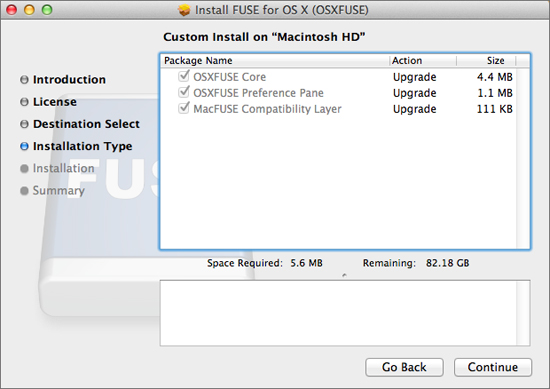
Note: During the installation please check all the three option ("OSXFUSE Core", "OSXFUSE Preference Pane" and "MacFUSE Compatibility layer") and click on “Continue” button to finish the installation, as shown in the picture above.
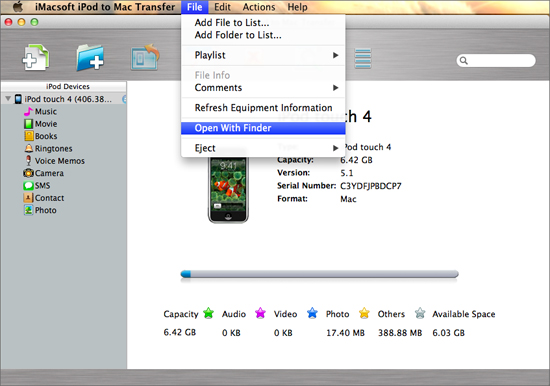
Step 2: Open iPhone/iPod Touch using Finder
Download iPhone to Mac Transfer here and install it on your Mac. Launch the program and connect your iPhone/iPod to Mac, all the content in your iPhone/iPod Touch will be displayed and sorted in appropriate categories. Now go to “File” tab and choose “open with Finder” option to open iPhone/iPod as a portable device and for browsing the folders and files stored on your iPhone/iPod.
On Mac OS X 10.6 or below:
Install iPhone to Mac Transfer and launch it. Now connect your iPhone/iPod Touch to Mac using the USB cable. After doing this, you will be able to see your device information and folders on the main interface of the program. Click on “File” tab and choose “Open with Finder” option to see all the files and data stored on your iPhone/iPod device.
Windows Version
![]()
Awards & Accreditations
